Table of Contents
How to Repair a Leaky Roof
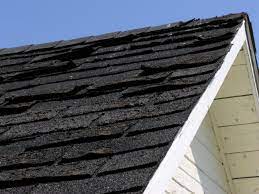
Leaky roofs can lead to a host of interior problems, including waterlogged attic insulation and ruined floors. It is essential to repair a leaky roof in order to maintain your home.
Roof repair can be a time-consuming project and is not for everyone. It’s a labor-intensive project that can be costly, but can preserve your home’s value.
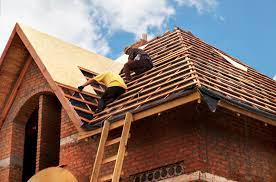
How to Roof a House
Because they are skilled and have enough experience to adapt to changing weather conditions, roofing companies can fix a house’s roof any time of the year. Do-it-yourselfers should choose the hottest and driest time of the year as the roof deck might be exposed for a few days.
This is also the safest time to be on your roof, so you won’t have to worry about slipping and sliding around.
This means that you can fix your roof leak from the spring through mid- or late summer, and sometimes even into fall in most places. Before you seal your roof, make sure to check the weather forecast.
Safety considerations
It can be dangerous to fix a leaky roof but roof repair is possible with the right materials and methods.
First, make sure you always have an assistant. If something were to happen to you, you want someone there to assist you.
Next, avoid working on a snowy, wet or icy roof. Take out any debris, such as leaves, pine cones and twigs, and use soft-soled boots.
To slow down and stop you from falling off the side of your house, use a Personal Fall Arrest System. To stop yourself from falling to the roof’s edge, you can use a fixed Fall Restraint System.
For all safety tips and recommendations, consult the OSHA publication “Protecting Roofing Workers”. You should also use all personal protective devices such as gloves, hearing protection, and a respirator.
Tools
- Flat pry bar
- Hammer
- Hook-blade shingle cutter
- Utility knife
- Ladder
- Flashlight
- Caulking gun
- Chalk line
- Circular saw
- Tape measure
- Pencil
- Personal protection devices
Materials
- Shingles
- Synthetic underlayment or roofing paper
- Nails for roofing
- 8d Common Nails
- Exterior sealant or roofing cement
- Roof vent (if replacing damaged vent)
- If you need to repair a roof deck that has been damaged, 7/16 inch exterior-grade plywood (or OSB board)
Instructions
1. Find the Roof Leak
Begin at the ceiling stain or the lowest point of the roof leak and work your way up. Access the attic with a flashlight and ladder. Visually follow a vertical line from the roof. The leak may be higher up the roofline and the leak could extend toward the roof ridge. The roof deck’s bottom may be stained or wet with mold or mildew.
Roof leaks can be caused by roof vents. Roof vents include turbines, attic fans, plumbing soil stack pipes, and any metal flashing that extends beyond the roofline. The roof leak could also be caused by damaged plywood roof decking (also called sheathing).
2. Examine Roof Vents
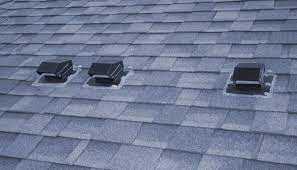
If the leak is caused by roof vents, you should return to the roof’s top and inspect the vents. It is possible that the boots or housings have cracked. It is also possible that the vents have become loose. You should check for missing or broken nails that hold the vents to your roof.
3. Pull the Damaged Roof Vent
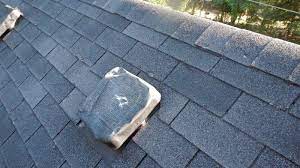
Remove the damaged roof vent from the top of your roof. Use the prybar to remove the nails that hold the shingles to vent. Next, remove the shingles from the vent’s base using the prybar. A second person can help you hold the shingles. Don’t remove the shingles. Take out the nails holding the vent to your roof deck. Finally, take out the vent.
4. Replace the Damaged Roof Vent
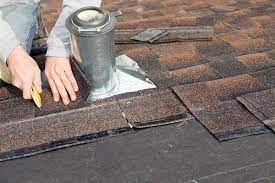
To seal the flashing at the vent’s bottom, apply a thick layer of roofing cement or an exterior sealant. As you slide the vent into place, have your assistant gently roll the shingles back and separate them.
To prevent leakage, the lower portion of the vent flashing should be placed over the shingles. The vent should be nailed at every corner and every four inches. Use cement or sealant to cover the nails.
5. Take Off Old Roofing Shingles
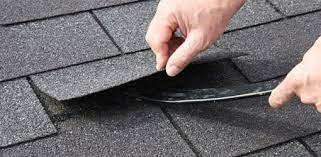
To access the affected section, remove any shingles that have been damaged to the roof deck.
Slide the prybar under the shingles, from the bottom up (towards the roof ridge). Begin about two rows of roofing shingles higher than the repair point. Next, move down through the rows, gradually loosening nails and pulling shingles off.
6. Pull the Old Roofing Paper
The roofing paper or synthetic underlayment can be used to separate the roofing deck from the shingles. Use a utility knife to cut the paper or the underlayment. As much as possible, keep it intact.
7. Mark the Deck Cut Area
Draw a chalk line along the roof rafters at the damaged area of the roof deck. Make sure you snap the line in the center of the roof rafters. Use existing nails to guide you to the rafter center.
Next, draw a line of chalk 90 degrees or crosswise to the rafters above and below the section that is damaged.
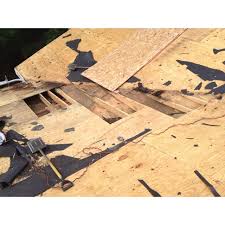
8. Cut Out The Roof Deck Damage
The circular saw blade should be set to the thickness of your roofing deck plus 1/16 inch. To remove the damaged section of the roof deck, follow the chalk lines. When cutting, be sure to not kneel in the area marked off.
9. Remove the Roof Deck
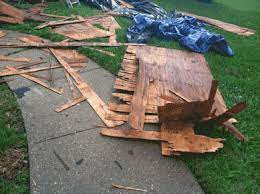
The pry bar can be used to remove nails from the roof deck section. Next, remove the damaged plywood, but don’t throw it away yet.
10. Make a New Roof Deck Patch
The damaged roof deck section can be used as a template to mark the dimensions for the new roof deck patch. This patch should be cut on the ground for safety.
11. Place the Roof Deck Patch
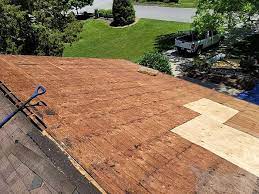
Set the roof deck patch on the roof and nail it to the rafters using 8d common nails.
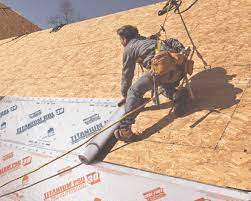
12. Lay paper or Underlayment
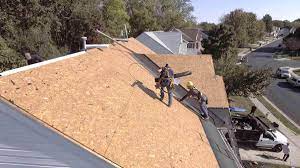
Start from the bottom and work your way up. Each row should be overlapped by at least 4 inches.
13. Lay the First Row of Shingles
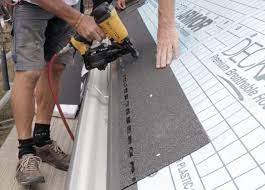
Lay the first row of shingles at the bottom area of the repair. Keep the rows you have already laid by layering in the new shingles in the existing shingles from left to right.
Use a bit of roofing cement to seal the edges of the shingles. The shingles should be nailed to the roof.
14. Finish the Shingles
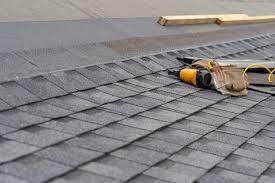
Continue working upwards until the top row is reached. Slide the new shingles underneath the top row to join the new shingles and the existing shingles.
When to call a pro
Roof leakage can be difficult and labor-intensive. The roof’s interconnected components must be coordinated to prevent leaks. This requires a lot of lifting, cutting, and climbing.
Call a roofing company if you are unsure about your ability to repair the roof quickly. If you are feeling unsafe while working on your roof, contact a professional.