Confused about all the different parts of a roof?
The roof of your home is more than just asphalt shingles.
Your roof protects your home from the elements, including rain, wind, and snow.
Understanding all the components of your roof is crucial for two reasons.
First, you’ll need to know these parts in order to communicate a problem to a professional roofing company.
Second, you need to be able to comprehend what they are talking about when conducting repairs.
Table of Contents
Architectural Elements of a Pitched Roof
Roofs come in many shapes and sizes. However, you only need to be familiar with a few terms to describe the most important architectural features:
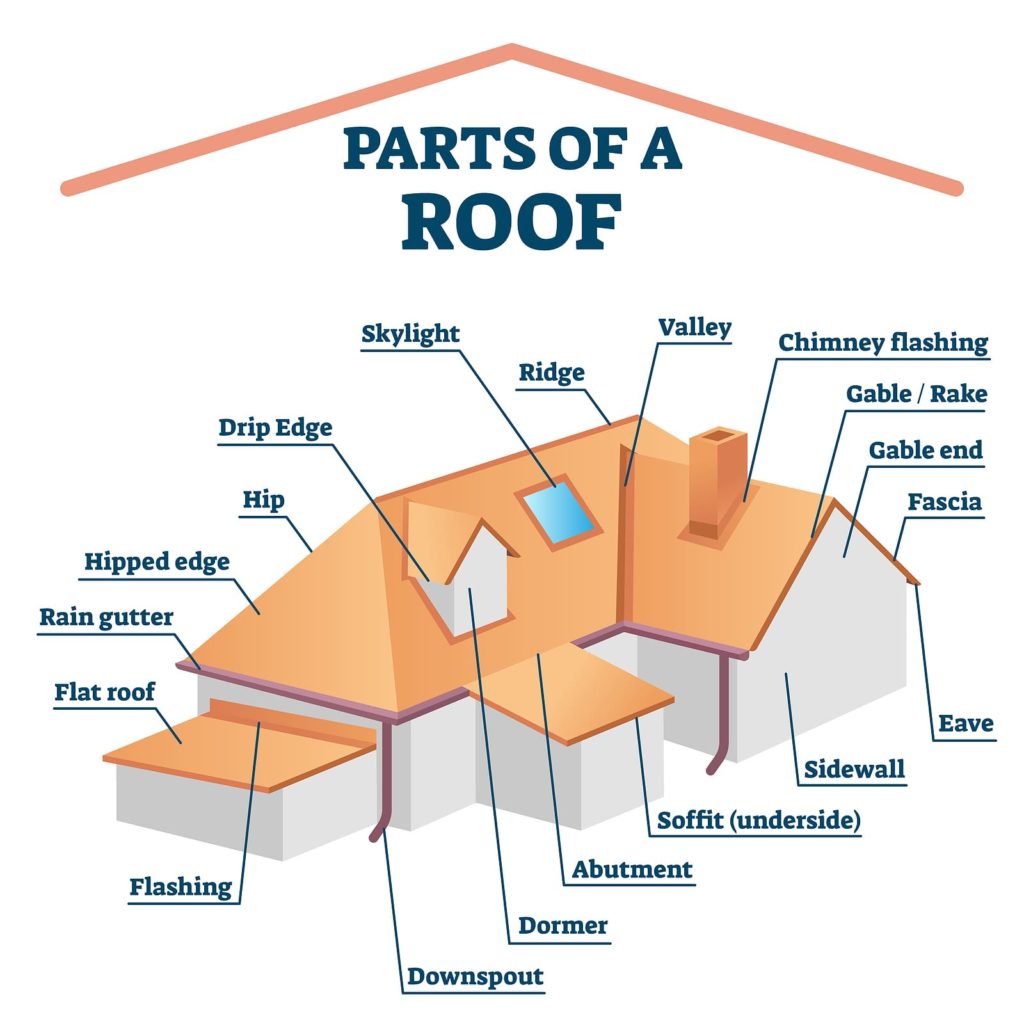
These are the roof’s components:
- Roof plane: This describes the roof’s surface. It can be flat or pitched, but it is usually at an angle. It is also known as the field of the roof.
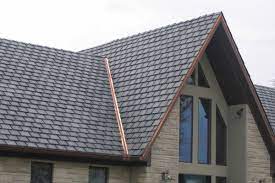
- Ridge: This is where the two roof planes meet.
- Valley: Here two pitched roof faces meet and project inward. They always have a lower slope than their adjoining roofs.
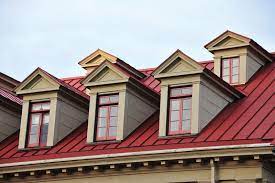
- Dormer: A roof feature that extends from the roof’s roof. It often houses a window, which adds light and space to the interior.
- Abutment: This is the place where the roof faces meet the wall of your home. It’s not a roof ridge. Small home additions such as bay windows, door canopies, attached sheds, or garages often have abutments.
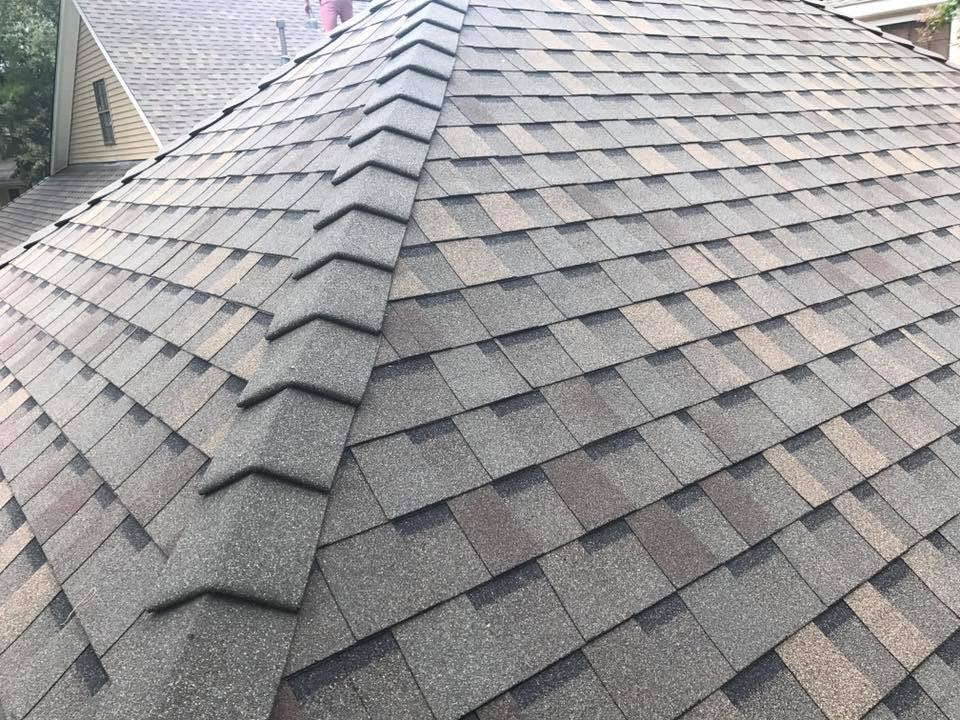
- Hip: The point where two roof faces meet and project outward. To cover hips on a roof, you will need a specific type of shingle called hip or ridge shingles.
- Gable: This triangular wall is located underneath the roof planes. It is important to remember that not every roof has gables.
- Hipped edge: The sloped roof between two roof hips is called the hipped roof edge. A pyramid roof has four hipped edges. Only two hipped edges are found on a hipped roof.
- Gable end: A gable end is an edge of a roof that extends above the gable.
- Eave: This is the area where the roof hangs above the exterior wall.
Anatomy of a Residential Pitched Roof
The structure and protection of your home is provided by the roof’s anatomy or layers.
- Shingles
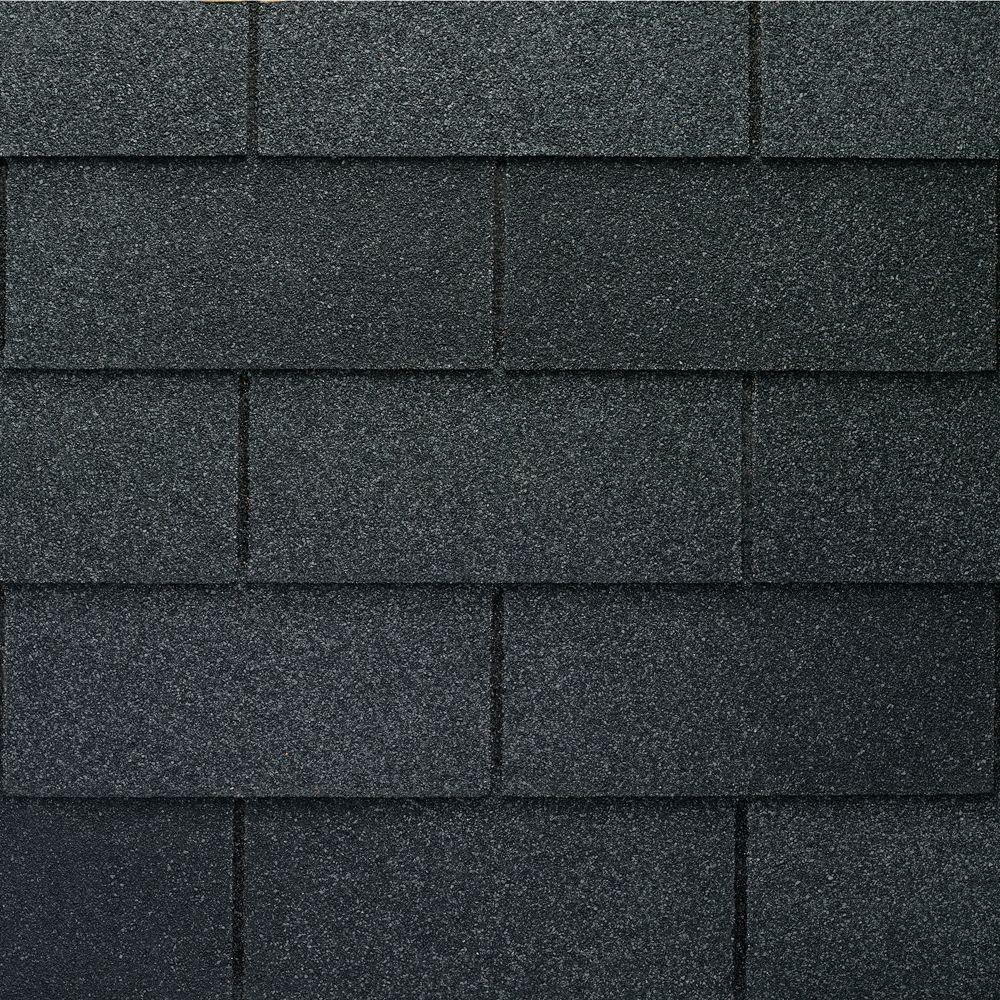
- Traditional or 3-tab shingles.
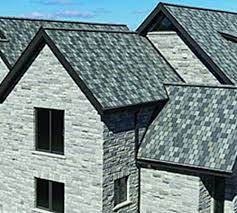
- Architectural shingles or laminate.
- Premium shingles.
- Starter shingles.
- Hip and Ridge cap shingles.
- Shingles that are solar reflective or thermal emissive.
- Mock slate shingles.
- Flashing
- Chimney flashing.
- Skylight flashing.
- Plumbing vent flashing.
- Roof vent flashing.
- Valley flashing.
- Flashing for dormer.
- Underlayment
- Synthetic underlays
- Ice and Water Protector
- Roof Frame
- Decking
- Parts of the roof’s edge
- Drip edge.
- Fascia.
- Gutters and downspouts.
- Soffit.
Let’s start by describing the anatomy at the top of the roof.
1. Shingles
The shingles are the most well-known component of a roof. Although slate and wooden shingles were popular in the past, asphalt shingles are now the most used residential roofing material in North America. There are generally three types of asphalt shingles.
- Traditional or 3-tab shingles: Both traditional and 3-tab shingles create a uniform appearance on your roof. This is because all shingles are the same size. These shingles are affordable and will last for many years.
- Architectural shingles or Laminate: Laminate and architectural shingles stand out for their distinctive appearance. They have accent tabs in different sizes, as well as deep shadow bands that add character.

- Designer Shingles: These shingles provide aesthetic enhancements that go beyond the standard of laminated shingles. There are many styles and looks available.
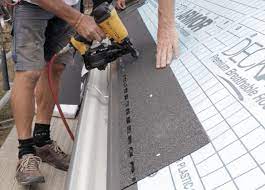
- Starter strip Shingles: At a roof’s eave edge or rake, the first course to be applied is a starter strip.
- Hip and Ridge Cap Shingles: Roofers install these shingles at the roof’s hips or ridges. The ridge cap and hip shingles have been specially designed to fit the roof’s ridge or hip.
To match your home’s style, asphalt shingles come in a variety of colors.
The shingles must be sealed together after being applied. Although roofing professionals will initially secure the shingles to their roofs with nails, some shingles have a heat activated sealant that will provide better wind resistance. The sealant will bond to the shingles once they have been exposed to warm weather.
Your roofing contractor might have applied the shingles in cold conditions. If this happens, they may have manually sealed them to protect against wind until warmer weather.
Shingles can be used to add uniqueness to a roof’s design and provide increased durability.
- Solar-reflective shingles and thermal-emissive: Shingle manufacturers can make shingles that reflect heat or emit it. These shingles will help keep your roof’s surface cool and may also help keep your attic space cool during hot, sunny days.
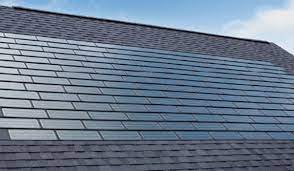
- Mock slate roofing: Asphalt shingles that are made to look like slate shingles.
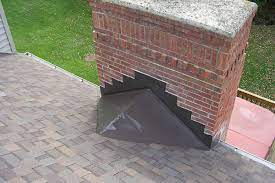
2. Flashing
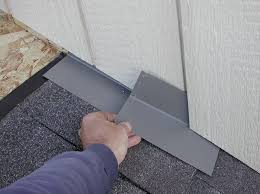
Flashing is a thin metal sheet that a roofing professional uses to cover any vertical surface that intersects the roof plane (e.g., a chimney’s surface).
Flashing is the most difficult component of any roof. A chimney is a good example of the importance of flashing.
Chimneys do not have shingles or underlayment and punch through your roof decking to reach your home below. Chimneys come with protection to stop water from getting in the top (a chimney cover); but what about the sides of the chimney?
How can you stop water from rushing down your chimney’s exterior, past the decking, underlayment, or shingles and into your home?
Flashing is the solution.
There are many roofing flashing options. Flashing can also be installed around other features of a residential roof, such as:
- Chimney: Flashing is installed around a chimney at an angle of approximately 90 degrees. One plane rests against the chimney’s face while the other extends horizontally below the underlayment but above the shingles.
- Skylights: Many skylight manufacturers include flashing in their products, particularly for deck-mounted or roof-mounted skylights. The roofing professional will have to add flashing around any skylight that does not include built-in flashing.

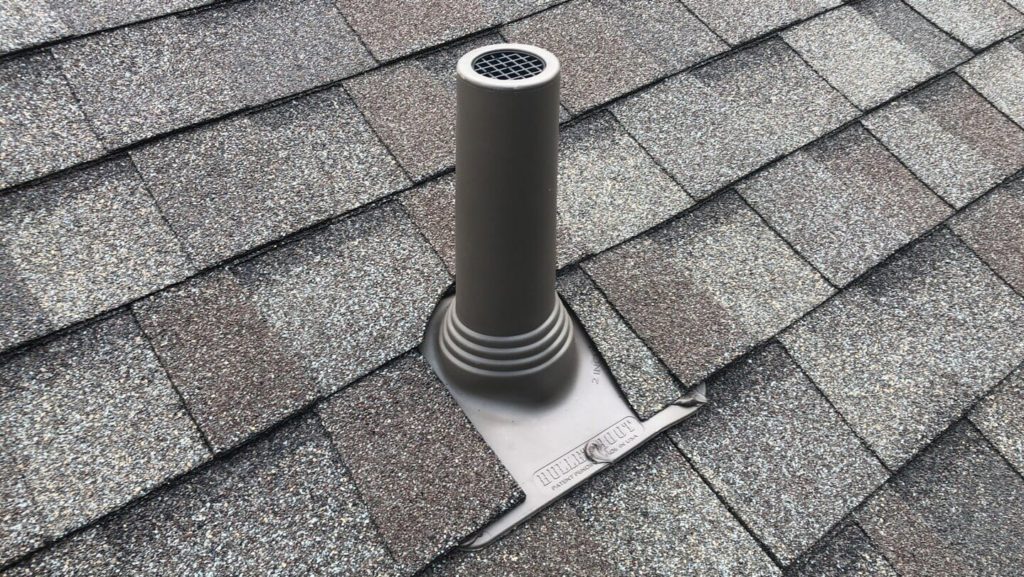
- Plumbing vents: A plumbing vent is a way to ventilate your home’s plumbing. It must have flashing at the junction with the roof.
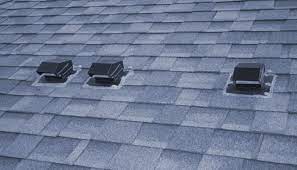
- Roof vents: There are many other types of vents that can be seen through the roof, and all will require flashing. There are gable vents, roof vents, and soffit vents. We’ll discuss them below. Vents are essential for keeping the attic space properly ventilated. Combining ridge and soffit vents will allow air to freely flow through the attic space.
Flashing is often required around roof architectural features. These are the design elements that shape the roof.
Flashing is required for architectural features such as:
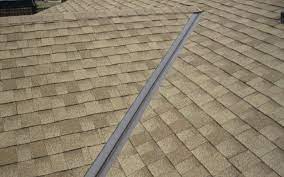
- Valleys: These indented areas are where two roof planes meet. Valleys in the open-valley style are flashed using a long flat piece of metal with a “v” or “w”-shaped center. Although you can cover a valley using shingles in either woven or closed-cut designs, these are less efficient than open valleys with metallic flashing.
- Dormers: When dormers join with the main roof, they create a valley that needs flashing. Flashing must also be added to the sides and front of the dormer.
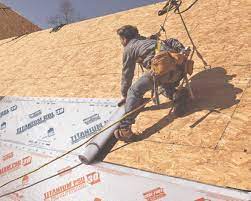
3. Underlayment
Underlayment resembles a fabric barrier. It is traditionally made from asphalt-saturated felt but it is now also available in synthetic form. It is applied directly to the decking and serves several functions.
It protects the shingles against any resin that the decking might release, and acts as a water barrier in the event that water seeps under the shingles. It can also provide fire resistance.
Furthermore, underlayment may help prevent “picture framing.”
Picture framing is generally the result of the expansion/contraction of the wood panels used for the roof deck. The roof’s surface is affected by the bumps and ridges created by the deck panels as they move. These bumps can look ugly and could cause problems with the roof’s water-shedding function.
There are many types of underlayment available, including synthetic underlayment. These types of underlayment have gained popularity over the years due to their lightweight and easy installation. Synthetic underlayment can have additional features that are not available in asphalt-saturated felt.
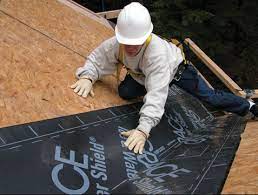
4. Ice and Water Protector
Another thin layer of material is added beneath the shingles to protect against ice and water. This protects shingles from water damage caused by wind-driven rain and ice dams. This material seals tightly around nails and provides a watertight seal. Some act as vapor retardants. This means that very little water vapor can pass through them.
It is possible to apply an ice and/or water protector to the entire roof deck in certain climates, especially hurricane-prone and high-wind areas.
If the attic is not ventilated properly, the ice protector and water protector can make matters worse.
Even in milder climates, ice protectors and water protectors are effective at providing an additional water barrier around vulnerable roof areas, such as valleys, the edge of the roof or roof features like skylights.
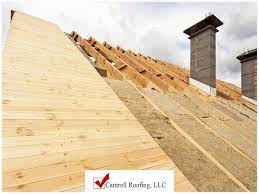
5. Roof Frame
Contractors will build a wooden frame to support the roof of a house. The roof truss is also known as the framing. It serves as the roof’s base. The structure of your roof frame is determined by various construction codes, both local and national. We will be focusing on the parts of your roof that are above the roof frame.
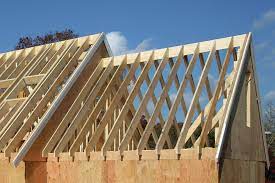
- Decking: Also known as roof sheathing, this covers the entire roof frame with a thin piece or decking of wood. Roof sheathing is typically plywood or oriented Strand Board (OSB), which is less than half an inch thick. The roof frame supports decking, and all other layers sit atop the decking.
6. Roof Edge Parts
We have only covered the basic layers of a roof, but they are not enough to protect your home. Water cannot just roll off your roof shingles and down your house’s face.
Otherwise, your bricks and siding could be damaged.
Additionally, water could collect at the foundation of your home and cause foundation problems. To protect your home, you will find several drainage components installed at the roof’s edge.
First, it is important to know that roof edges can be divided into rakes and eaves.
An eave refers to the horizontal edge of the roof that hangs above the exterior wall.
A rake is an edge that slopes to the exterior wall where a roof hangs. It is important to properly manage drainage from roofs at the eaves and protect against wind-driven rainfall at the rake.
These are the components of a roof edge:
- Drip edge: Water that reaches the roof’s eave edge meets the drip edges. Also known as the eaves flashing. This is a thin strip of metal that directs water to the gutters. The drip edge should be installed by a roofing professional before or after the underlayment for the rake edges. Without a drip edge water will not drain properly and will flow down the wall and absorb into the exposed edge. This could cause further damage to your home.
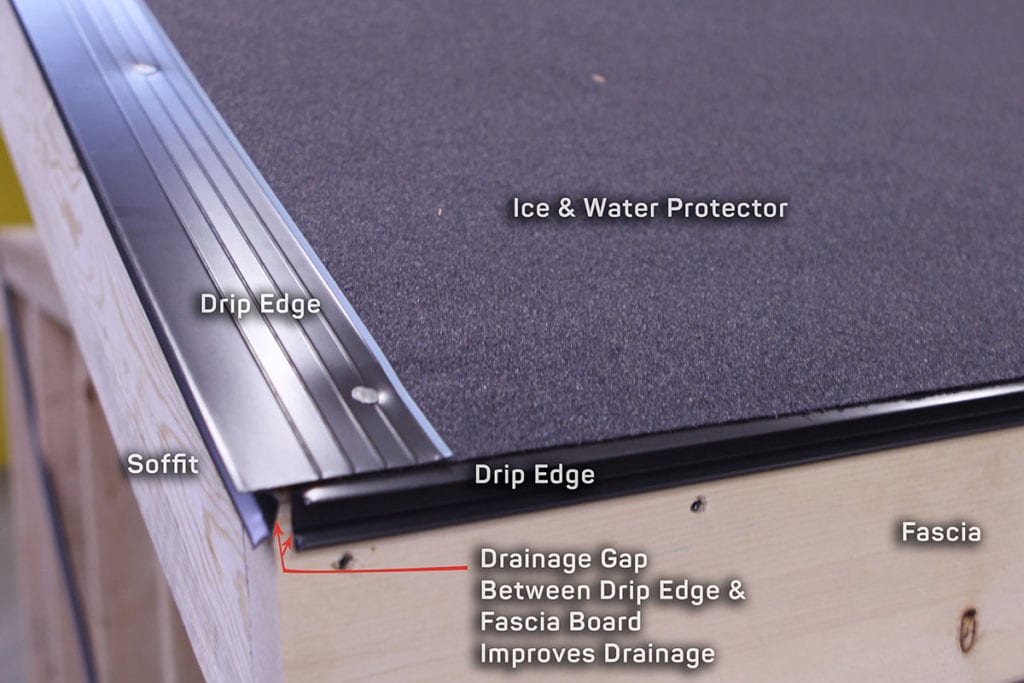
- Fascia: The highest vertical component of an exterior at the roof edge is the fascia. The drip edge is placed at the roof deck’s edge by the roofing professional and the rain gutter is attached directly to the fascia.
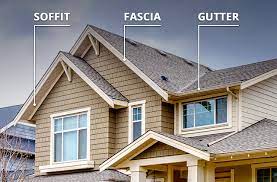
- Gutters & Downspouts: Drains are the metal or plastic troughs that drain water from roof edges. These connect to downspouts which bring water down and direct it away from the foundation. You could have foundation problems or other damages if you don’t have downspouts.
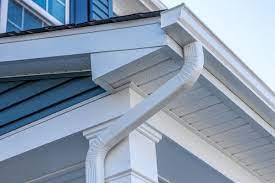
- Soffit: Many roof styles have a soffit. The soffit is the horizontal side of an extension that extends beyond the exterior wall when the roof’s eave edge extends past the roof’s exterior wall. Many soffits have vent openings or are perforated to allow for ventilation in the attic space. Combining ridge vents at top of the roof with soffit vents can provide roof ventilation.
These roof components are designed to work in concert as a system that drains water away from your house and protects it from the elements.
Do You Want to Learn More About the Parts of Your Roof?
It’s helpful to know the different parts of the roof so your roofer can communicate with you. Knowing the components of your roof can be a great asset if you are building a home.
You can learn more about residential pitched roofs’ structure by reading our other blog posts or by giving us a call.